Our DIY Fireplace (before & after)
If you've been following along my stories on Instagram, you may have seen bits and pieces of our fireplace renovation. Now that it's finally done, I wanted to compile all the shots to show you our process + the final look :o)

Before
When we first moved in, I knew right away that these rocks had to go. It was so big and bulky that we would joke that you could rock climb on it. We wanted something more clean and simple so fixing up the fireplace was at the top of our DIY list.
So first things first, we took down the rocks.
Luckily for us, they were artificial so it wasn't too difficult to take them down. After covering our carpet and surrounding furniture pieces with sheets of plastic, Patrick and his dad Erik drilled them off the wall. During this part, I would definitely recommend opening all the doors and windows because it can get real dusty and messy!
Once the rocks were down, we got sheets of plywood to cover up the entire wall. There was this random opening above the fireplace that we wanted to cover up so this was the best option. We first measured the wall and got the plywood cut accordingly. Then we drilled them onto the wall as a foundation and added a coat of white paint. We wanted to lay in bricks around the actual fire pit area so we made sure to leave some space there.


Now for the fun part — shiplap!
We're big fans of Chip and Joanna Gaines so we had to have shiplap in our house. Originally we were going to have it only for the top section but we ended up loving it so much, we repeated it under the bench as well. In order to keep the spacing even, we put nickels in between each plank to create that shiplap look. Since the pieces were so thin, we just used a nail gun and left the nail holes exposed for that rustic look.
Once that was up, Patrick laid in the brick around the pit to match the bench. Then, we went in with two coats of flat white paint over the shiplap and an additional coat over the brick. We used a wide paint roller to cover the surface area ,then went in with a paintbrush to go over all the grooves and edges. It's amazing what a coat of paint can do!


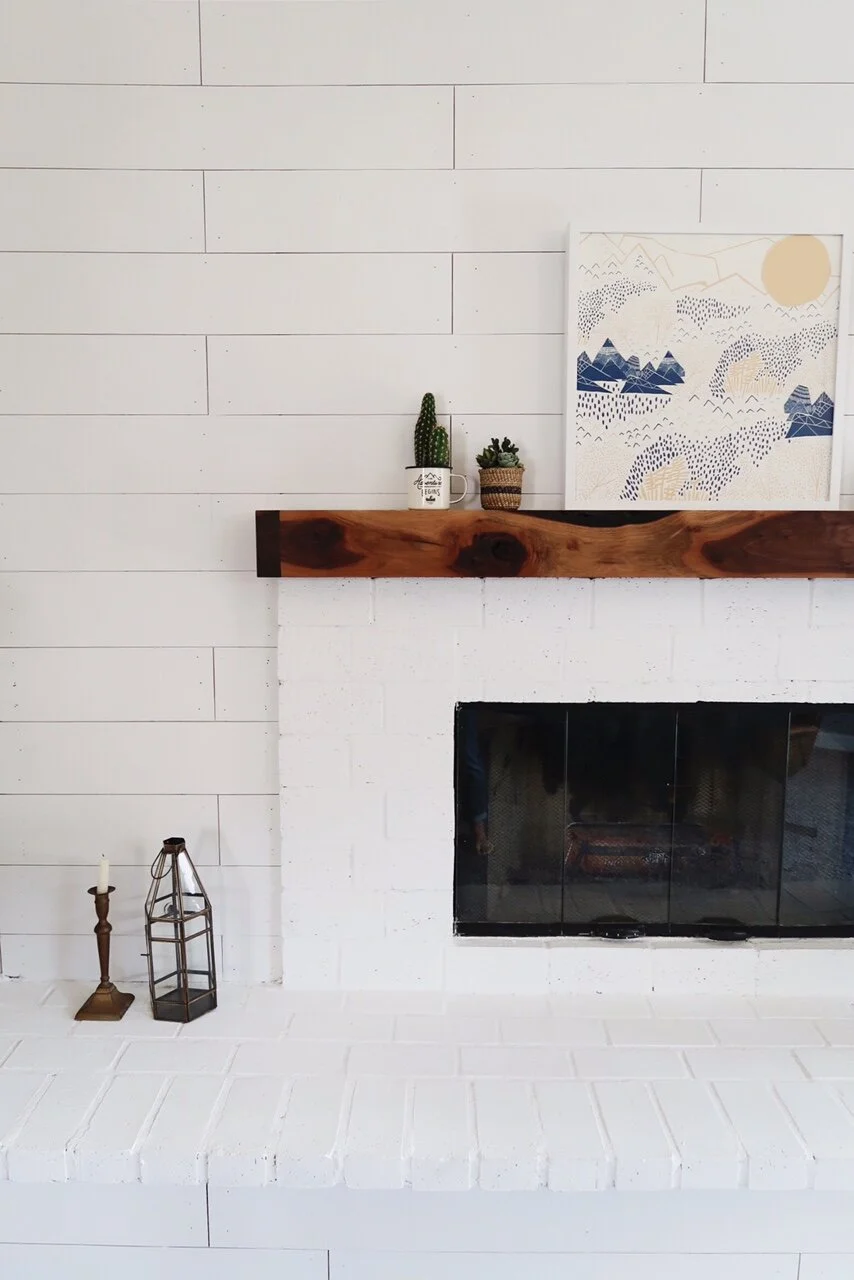
After
For the final touch, Patrick and I went to Austin Hardwoods and picked up some wood for the mantle. We found the most beautiful piece of walnut with perfectly imperfect edges and had to take it home with us. This was the biggest investment of our fireplace but well worth it! We had the wood cut into two pieces and Patrick glued them side-by-side to add more depth. Once the glue was set, he added screws to the wall and inserted the mantle to secure it in place. And voila — our new fireplace was done!


The total project from start to finish took us about 2 weeks and the wood mantle added another week or so. I wouldn't say it was crazy labor intensive but it definitely required a lot of planning beforehand. With the help of Erik, we measured everything from the plywood, brick and mantle so everything would fit together. We also had to wait during each step to make sure the brick were set in place and that the paint was dry before moving forward.
We spent around $300 total for our fireplace renovation. Honestly, we could have cut down the budget in half if we hadn't bought the walnut but it was well worth it. Both the shiplap and the brick were really affordable and the only other thing you need are supplies for paint. For tools, the important things to have is a drill, screwdriver, nail gun. Luckily, Pat's dad had all of the things we needed so we were covered there. Oh and make sure you have a powerful vacuum to cleanup all that rubble after teardown.
The fireplace is definitely the centerpiece of the living and I am beyond happy with the outcome. For decorations, I got the screen printed art piece from Urban Outfitters, succulents from M. Lovewell, and the rest of the pieces are random finds from flea markets and thrift stores.
I hope you enjoyed this home DIY segment + I can't wait to share more renovation projects with you!
All photos were taken and edited by me